Complete Guide to Ceiling Fan Installation at Home Depot
Are you looking to upgrade your home's interior with a stylish and energy-efficient ceiling fan? Installing a ceiling fan can be a great way to improve air circulation, reduce energy bills, and enhance the overall ambiance of your living space. In this comprehensive guide, we'll walk you through the step-by-step process of installing a ceiling fan at Home Depot, covering the essential tools, materials, and safety precautions you need to consider.
Before You Begin: Safety Precautions and Planning
Before starting your ceiling fan installation project, it's essential to read and save the instructions provided by Home Depot. Additionally, if you're not familiar with national and local electrical codes and basic electrical wiring procedures, we recommend that you hire a licensed electrician to install your new ceiling fan. Your safety and the safety of others in your household are top priorities.
Tools and Materials Required
- Phillips screwdriver
- Blade screwdriver
- 11 mm wrench
- Step ladder
- Wire cutters
Choosing the Right Ceiling Fan for Your Space
Selecting the perfect ceiling fan for your room involves considering several factors, including the room's size, shape, and layout, as well as the desired style and functionality. Home Depot offers a wide range of ceiling fans in various designs, sizes, and features, so be sure to browse their collection to find the best fit for your space.
Step-by-Step Ceiling Fan Installation Guide
- Inspect Electrical Outlets: Ensure the electrical outlets in your ceiling are suitable for the new ceiling fan and that the wiring is intact.
- Mount the Junction Box: Attach the junction box to the ceiling using screws or nails, making sure it's securely fastened.
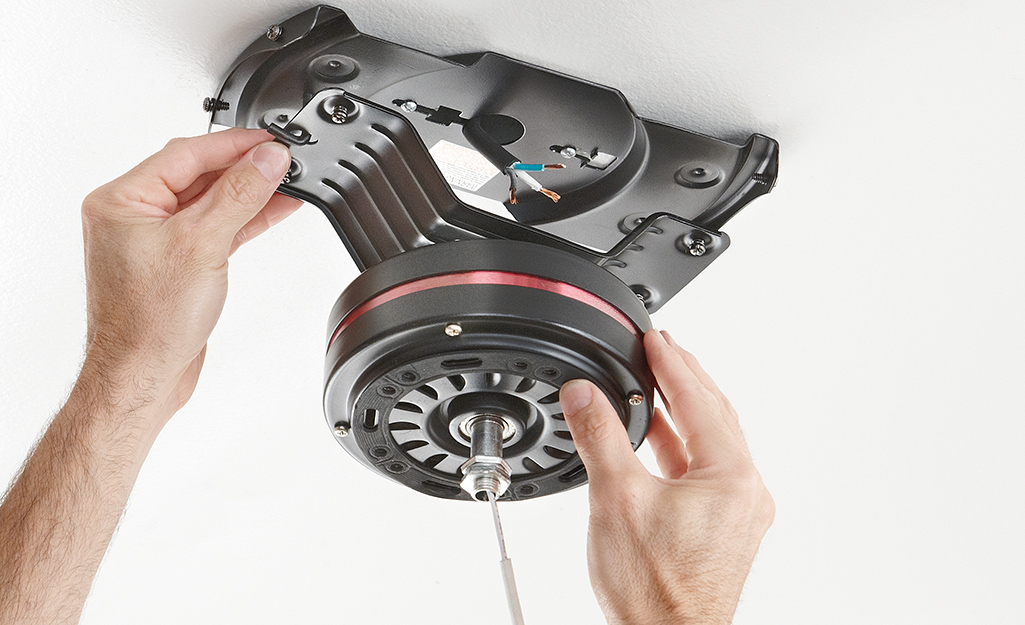
- Mount the Bracket: Install the bracket onto the junction box, following the manufacturer's instructions.
- Set the Downrod: Adjust the downrod to the desired length, ensuring it's securely attached to the bracket.
- Wiring the Fan: Connect the wiring to the ceiling fan, following the manufacturer's instructions and ensuring all connections are secure.
- Attaching the Blades and Adding Bulbs: Install the ceiling fan blades and add the required bulbs, following the manufacturer's instructions.
Additional Tips and Reminders
- Do not insert anything into the fan blades while the ceiling fan is operating.
- Ensure the ceiling fan is mounted at least 2.3 meters from the floor to minimize the risk of accidental contact with the fan blades.
- Consult the manufacturer's instructions for specific installation requirements and safety precautions.
Why Choose Home Depot for Your Ceiling Fan Installation Needs?
Home Depot is a trusted home improvement retailer offering a wide selection of ceiling fans from top brands, as well as expert advice, installation services, and competitive pricing. By choosing Home Depot for your ceiling fan installation needs, you can ensure a smooth and hassle-free experience, with the peace of mind that you're getting the best possible quality and value for your money.
With these step-by-step instructions and essential tips, you're well on your way to installing a stunning ceiling fan at Home Depot. Remember to follow all safety precautions and manufacturer instructions to ensure a successful installation and enjoy the benefits of improved air circulation, reduced energy bills, and a stylishly enhanced living space.


