Configuring a Wireless Router for Guest Network: A Comprehensive Guide
As the number of devices connected to the internet grows, setting up a guest network has become a necessity for homeowners and business owners. A guest network allows visitors to access the internet without compromising the security and privacy of the main network. In this article, we will explore the importance of setting up a guest network, its benefits, and the steps to configure a guest network on a wireless router.
Why Set Up a Guest Network?
A guest network is essential for providing internet access to visitors, such as friends, family, or business clients, without compromising the security and privacy of the main network. This is particularly important when you have visitors who may not be trusted with access to your main network.
Benefits of Guest Network
- Enhanced Security: A guest network isolates visitors' devices from the main network, reducing the risk of unauthorized access to sensitive data.
- Improved Bandwidth Management: A guest network allows you to control the bandwidth allocation for visitors, preventing them from hogging the main network's resources.
- Better Network Management: A guest network provides a separate SSID, making it easier to manage and monitor guest access.
Configuring a Guest Network on a Wireless Router
Configuring a guest network on a wireless router is a straightforward process that can be completed in a few steps. Here's a step-by-step guide:
Step 1: Access the Router Settings
To configure a guest network, you need to access the router settings. This is typically done by typing the router's IP address in a web browser. The default IP address varies depending on the router model, but common IP addresses include 192.168.0.1, 192.168.1.1, or 10.0.0.1.
Step 2: Enable the Guest Network
Once you have accessed the router settings, navigate to the Advanced or Guest Network section. Look for the option to enable the guest network. This option may be labeled as "Guest Network" or "Secure Access." Enable the guest network and choose the network band (2.4GHz or 5GHz) you want to use for the guest network.
Step 3: Customize the Guest Network
Customize the guest network by setting the SSID (network name), password, and security settings. You can choose to enable WPA/WPA2-Personal or disable wireless security. It's essential to use a strong password to prevent unauthorized access to the guest network.
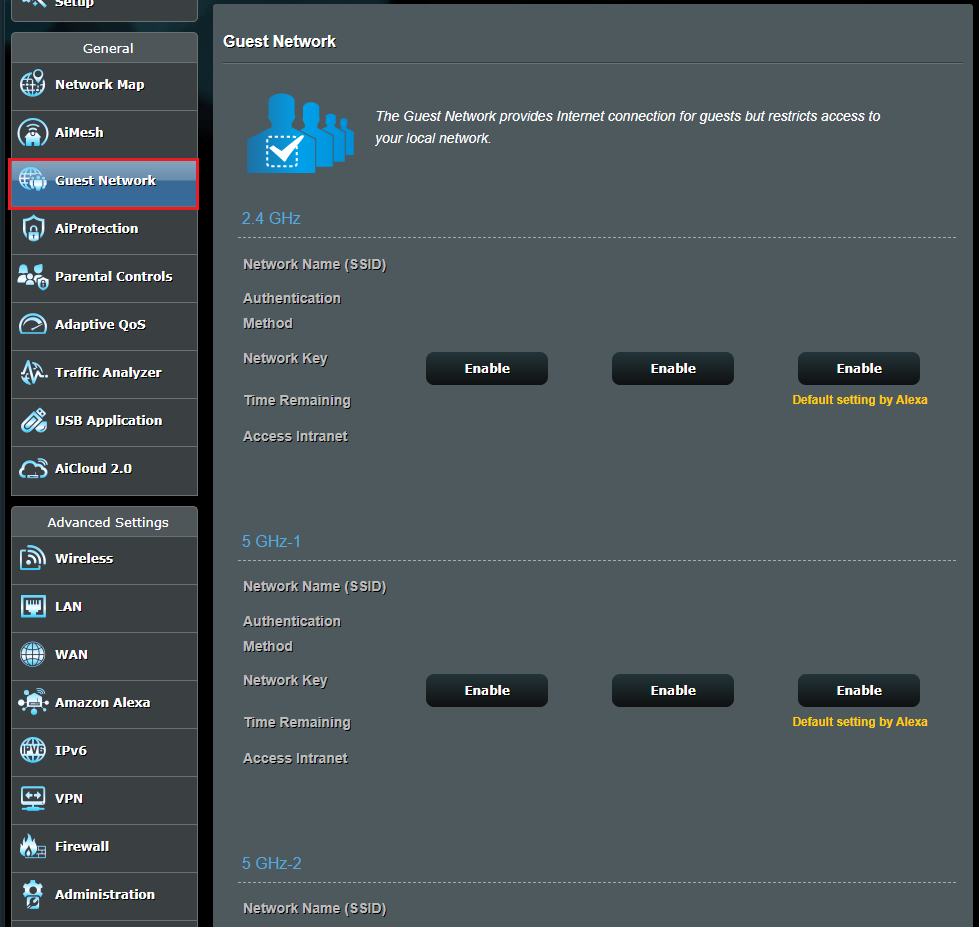
Step 4: Set Up the Guest Network Features
Some routers come with advanced guest network features, such as bandwidth limitation, time limits, and access control. Set up these features to manage guest access and ensure the network runs smoothly.
Using a Secondary Router for Guest Network
Another way to set up a guest network is by using a secondary router. The secondary router operates in WISP, Repeater, WAP, or similar mode and rebroadcasts the network with a different SSID. This method is suitable for repurposing old routers or setting up a guest network.
Conclusion
Setting up a guest network is a simple and essential step in maintaining a secure and private internet connection. By following the steps outlined in this article, you can configure a guest network on your wireless router and provide visitors with a separate internet connection without compromising your main network's security and privacy. Ensure you use a strong password and set up advanced features to ensure guest access is managed properly.
Frequently Asked Questions
Q: What is a guest network?
A: A guest network is a separate wireless network that provides internet access to visitors without compromising the security and privacy of the main network.
Q: Why is a guest network important?
A: A guest network is essential for providing internet access to visitors while maintaining the security and privacy of the main network.
")

![[Wireless Router] How to set up Guest Network on ASUS Router?](https://media.geeksforgeeks.org/wp-content/uploads/20241008162238554282/How-to-Setup-a-Guest-WiFi-Network-.webp "[Wireless Router] How to set up Guest Network on ASUS Router?")


