TP-Link Router Setup with Wireless Settings: A Step-by-Step Guide
Are you in the process of setting up a new TP-Link router? If so, you've come to the right place! In this article, we will walk you through the process of configuring your TP-Link router with wireless settings, ensuring a secure and efficient internet connection for all your devices.
Understanding Your TP-Link Router
A TP-Link router is a device that connects multiple devices, such as computers and smartphones, to a network. Once you've purchased a new TP-Link router, you can configure it using the Quick Setup process through its user interface, accessible via a web browser on your PC.
Depending on your TP-Link router model, you may need to access the web interface using specific addresses, such as tplinkwifi.net or the local IP address (192.168.0.1 or 192.168.1.1). Make sure to refer to your router's documentation or online support resources for the exact URL.
Step-by-Step TP-Link Router Setup with Wireless Settings
- Step 1: Connect Your Router - Plug in your TP-Link router and power it on. Ensure that it's properly connected to your modem via an Ethernet cable.
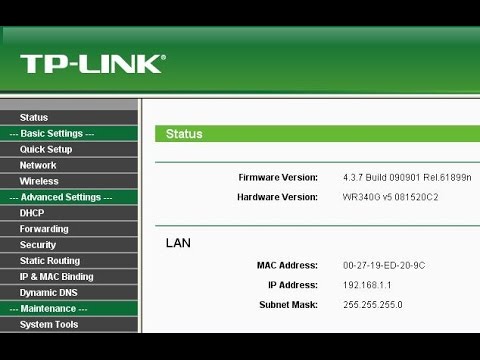
- Step 2: Access the Web Interface - Open a web browser on your computer and enter the IP address of your TP-Link router. This will typically be tplinkwifi.net. Alternatively, you can also use the default IP address (192.168.0.1 or 192.168.1.1) or the TP-Link Tether app.
- Step 3: Log In - Enter the default admin username and password, usually found on the underside of the router or in the documentation. You can also reset the router to its default settings using the button on the back.
- Step 4: Configure Your Internet Settings - Access the Advanced Settings page and configure your internet settings, including your ISP details and connection type.
- Step 5: Set Up Wireless Settings - Configure your wireless settings, including the network name (SSID), password, and security options. Make sure to set a strong and unique password to ensure your network's security.
- Step 6: Save and Apply Changes - Save all changes and ensure they're applied to your router.
Customizing Your TP-Link Router's Wireless Settings
Customizing your TP-Link router's wireless settings is crucial for secure and efficient internet usage. By following these steps, you can easily set up your network's SSID, password, and security options. The TP-Link Tether app provides a simple and intuitive way to access and manage your router, including blocking unwanted devices, setting up Parental Controls, and configuring your wireless settings.
Using the TP-Link Tether App
The TP-Link Tether app is a powerful tool for managing your TP-Link router. With the app, you can:
- Block unwanted devices from accessing your network
- Set up Parental Controls to limit access to specific websites or devices
- Configure your wireless settings, including the network name (SSID) and password
- Check the status of your networking devices
Troubleshooting Common Issues with Your TP-Link Router
Having trouble with your TP-Link router? Don't worry! We've got you covered. Here are some common issues and their solutions:
- Forgot your Wi-Fi password? Recheck the labeling on your router or reset the device using the Tether app or web interface.
- Can't access the web interface? Ensure you're entering the correct IP address or username and password.
- Issues with your wireless connection? Restart your router and try reconnecting to the network.
Conclusion
Setup your TP-Link router with wireless settings is a straightforward process that takes you from plugging in the hardware to having a secure, working Wi-Fi network for all your devices. Follow these step-by-step instructions to complete the setup, and ensure a stable, fast, and efficient internet connection. Remember to customize your wireless settings to suit your needs and keep your network secure.


")


