Mastering Your NETGEAR G Router Settings for a Seamless Internet Experience
Setting up a new wireless router can be a daunting task, especially with the numerous settings to configure. However, with the right guidance, setting up a NETGEAR G router is easy and straightforward. In this article, we will walk you through the process of accessing and configuring your NETGEAR G router settings, ensuring a seamless internet experience for all your devices.
Accessing Your NETGEAR G Router Settings
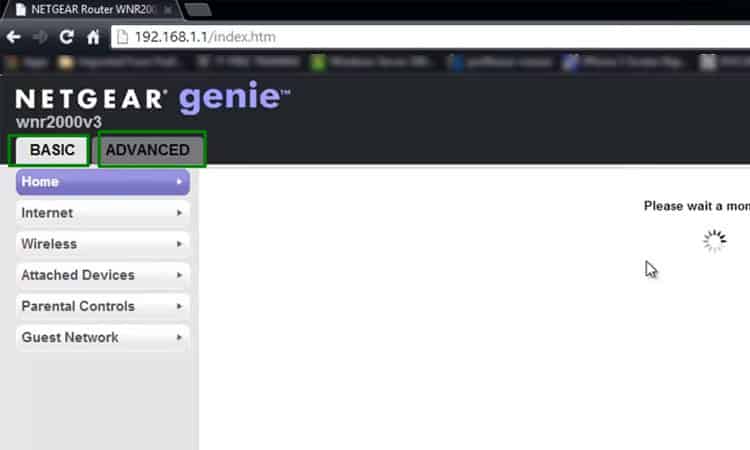
To access your NETGEAR G router settings, you'll need to connect your computer or mobile device to the router's network. Once connected, open a web browser and type http://routerlogin.net or http://192.168.1.1 in the address bar. This will take you to the router's login page, where you can enter your admin credentials to access the settings.
Understanding Your NETGEAR G Router Settings
Once you've accessed your router settings, you'll see a variety of options to configure. Here are some key settings to consider:
- Wireless Settings: This section allows you to configure your wireless network settings, including the network name (SSID), password, and channel.
- Security Settings: This section allows you to configure your security settings, including the type of encryption used, password, and other security features.
- Network Settings: This section allows you to configure your network settings, including the IP address, subnet mask, and gateway.
- DNS Settings: This section allows you to configure your DNS settings, including the DNS servers and search domains.
Configuring Your NETGEAR G Router Settings
Now that you've understood the different settings available, let's walk through the process of configuring your NETGEAR G router settings. Here are some key steps to follow:
Step 1: Access Your Router Settings
Connect your computer or mobile device to the router's network and open a web browser. Type http://routerlogin.net or http://192.168.1.1 in the address bar and enter your admin credentials to access the settings.
Step 2: Configure Your Wireless Settings
In the Wireless Settings section, configure your network name (SSID), password, and channel. Make sure to save your changes and apply them to your router.
Step 3: Configure Your Security Settings
In the Security Settings section, configure your security settings, including the type of encryption used, password, and other security features. Make sure to save your changes and apply them to your router.
Step 4: Configure Your Network Settings
In the Network Settings section, configure your network settings, including the IP address, subnet mask, and gateway. Make sure to save your changes and apply them to your router.
Step 5: Configure Your DNS Settings
In the DNS Settings section, configure your DNS settings, including the DNS servers and search domains. Make sure to save your changes and apply them to your router.
Conclusion
Mastering your NETGEAR G router settings is crucial for a seamless internet experience. By following the steps outlined in this article, you can access and configure your router settings, ensuring a stable and secure connection for all your devices. Remember to save your changes and apply them to your router to ensure a smooth internet experience.
Frequently Asked Questions
Here are some frequently asked questions related to NETGEAR G router settings:
- What is the default IP address of my NETGEAR G router? The default IP address of your NETGEAR G router is http://192.168.1.1.
- How do I change my wireless network name (SSID)? To change your wireless network name (SSID), access your router settings and go to the Wireless Settings section. Click on the "Wireless Settings" tab and change the network name (SSID) to your desired name.
- How do I change my router password? To change your router password, access your router settings and go to the Security Settings section. Click on the "Security Settings" tab and change the password to your desired password.


